


Description
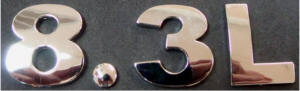
There is no background — the set of letters peels off and sticks directly onto your car’s body. Raised three-dimensional words: “VIPER SRT-10”.
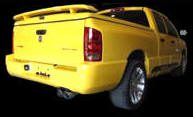
Your stock logo letters on the fenders can be easily removed without damaging the paint. Replace them with these vinyl chrome logos.
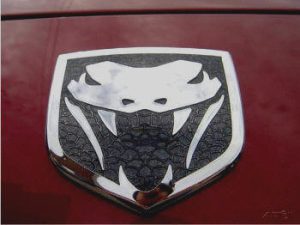
What a difference these logos make on your Viper! They will not fade, rust, or lose their luster.
Chrome vinyl base with a clear polyurethane raised three-dimensional layer on top of each letter creates a deep, rich 3D sparkle chrome finish.
SIZE: Approximately the same size as the stock fender logo.
Removing Old Emblem and Mounting Replacement Emblems
Mounting Instructions
- First, wash the area on the car where you will mount the emblems with soap and water. Next, wipe the area with rubbing alcohol to remove any oils from the paint surface. This will not harm your paint.
- Removing the old emblem: Use masking tape to outline the emblem on the bottom, top, and left sides (not the right side). This will help you position the new emblem correctly. (See Diagram 1.)
- Take the pink scraper included and carefully pry it underneath the old emblem (Diagram 2). The tool should remove the old emblem easily without scratching your paint.
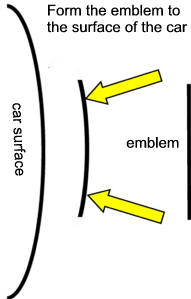
- Important: Some mounting surfaces may be curved. Slightly bend the new emblem letters to match the curve of the car surface. Test-fit the emblem, and adjust until it sits properly. (See Diagram 5.)
- Hold the new emblem (without peeling off the backing) against the spot where it will be mounted. Familiarize yourself with the placement.
- If your emblem came with a “map” (stencil), stick the map over the desired location. Place the emblem letters into the cutout spaces on the map, then remove the map once done.
NOTE: You can also mark tick lines with a pencil on the masking tape to indicate where each letter or symbol begins for precise placement.
Once satisfied, use the included promoter packet. Wipe the area with the damp towelette where the new emblem will mount. (This will not harm your paint.)
Peel off the liner from the back of the new emblem and carefully hold it up to the mounting spot. Gently set it in place without pressing down immediately. Make any final adjustments (see Diagrams 3 & 4), then press firmly across the entire surface to ensure a tight bond. Remove the masking tape — you’re done!


Reviews
There are no reviews yet.