
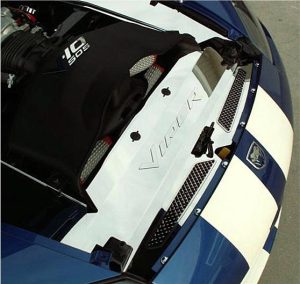
Description
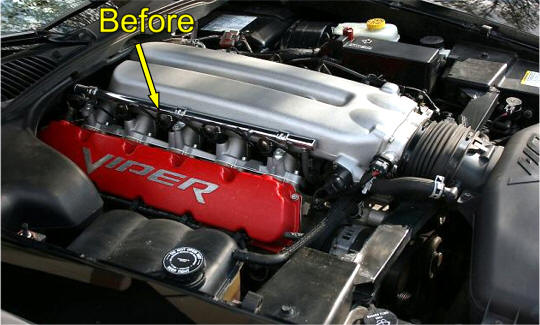
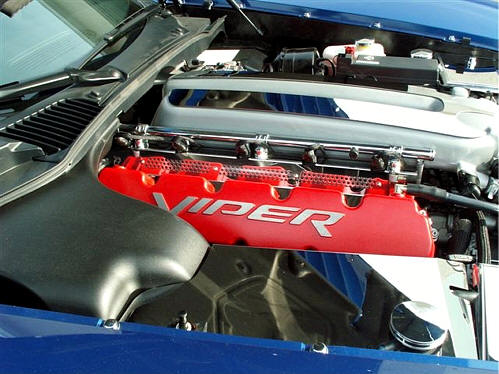
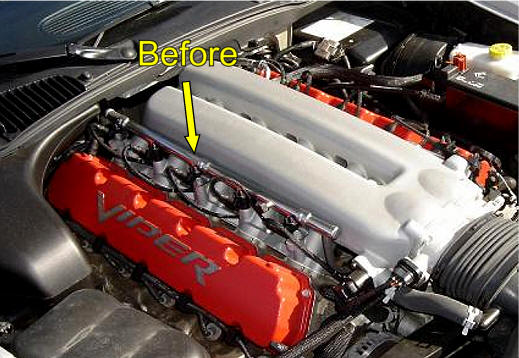
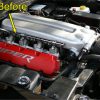
WOW, what a difference — when you see it on!
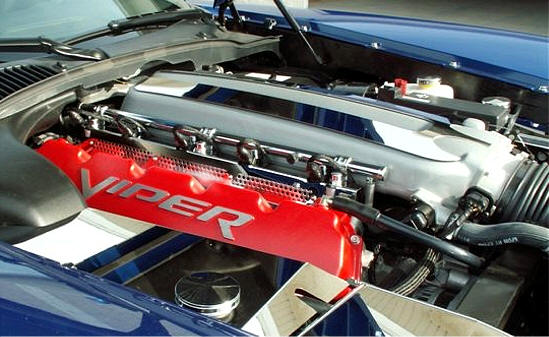
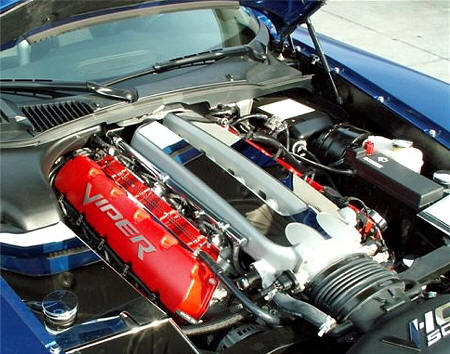
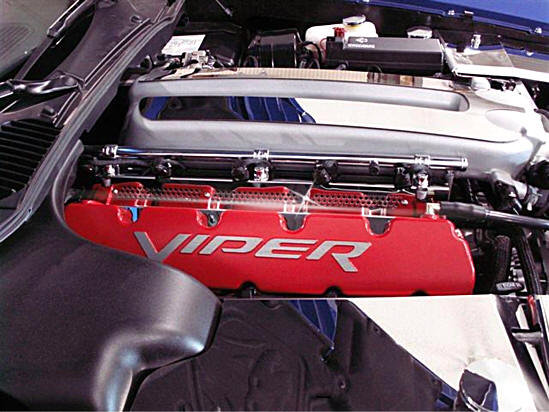
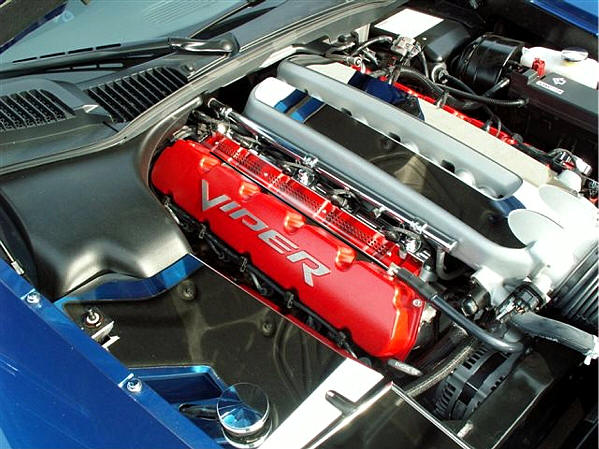
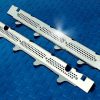
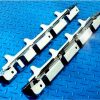
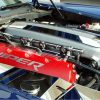
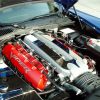
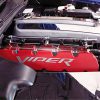
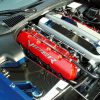
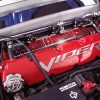
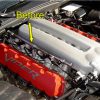
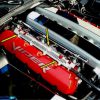
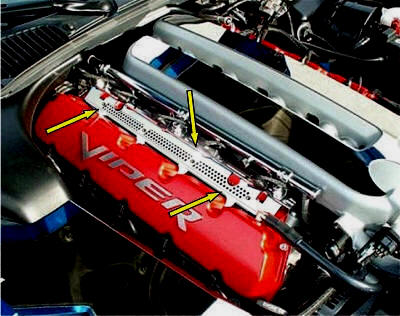
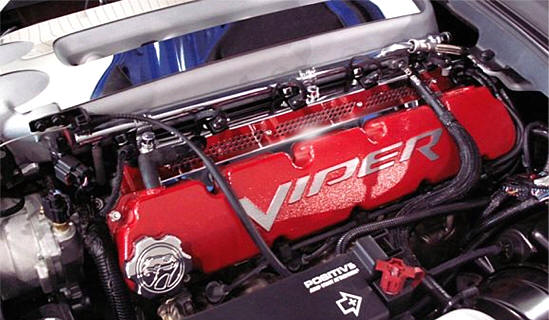
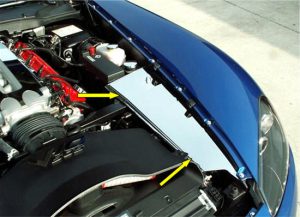
These High-Polished Stainless Steel Fuel Rail Covers with perforated breather windows instantly transform your engine bay. They cover up messy areas and give your engine manifold that clean, show-car look.
Designed to maintain proper engine temperature, these covers not only improve appearance but are also completely safe for performance use. They install easily using your factory bolts and will never rust, corrode, or come loose.
DODGE Viper SRT-10 (2003–2006) Fuel Rail Covers
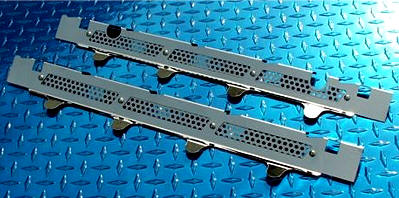
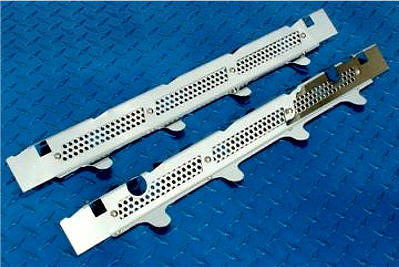
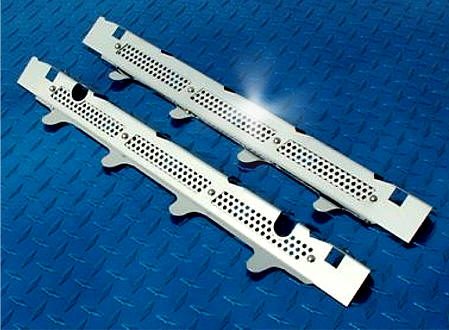
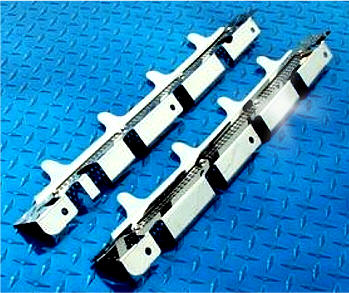
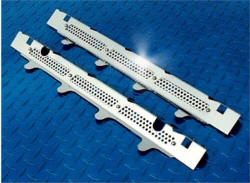
High Polished Stainless Steel
PART # ACC-973006
INSTALLATION INSTRUCTIONS
PARTS INCLUDED:
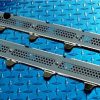
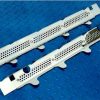
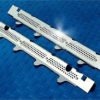
- 2 x Stainless Fuel Rail Inserts
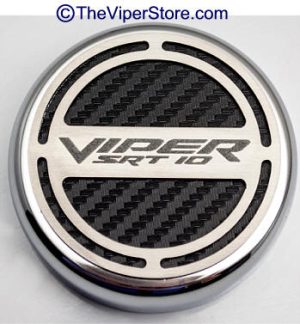
- 6 x Chrome Bolt Covers (123NC)
These premium stainless-steel inserts are designed to enhance the look of your Viper’s intake manifold and fuel rail assembly. Made from high-grade 304 stainless steel, they are vented for optimal heat dissipation while delivering a sleek, high-performance appearance.
- Passenger Side Installation:
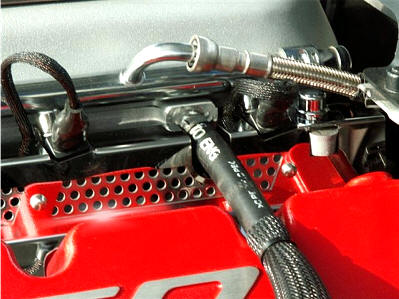
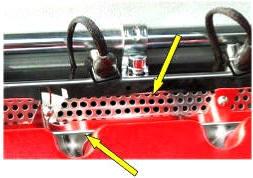
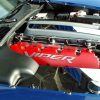
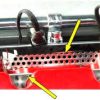
Remove the three factory fuel rail bolts and set them aside. Position the correct insert under the wiper cowl ridge over the engine, inserting the teeth into the valve cover slots. Carefully manipulate the injectors and injector wires so the insert rests properly over the exposed fuel rail bolt holes.
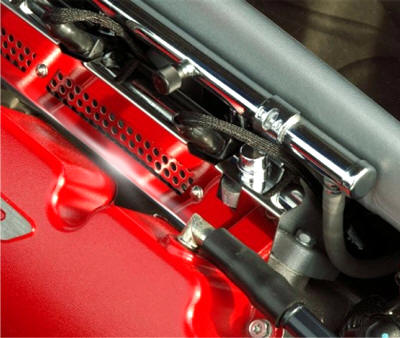
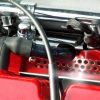
You may need to gently maneuver the insert under the pressure port cap (right side of the fuel rail). Allow the wires to rest between the top edge of the insert and the chrome fuel rail. - Secure the Insert:
Align the three holes and reinstall the factory bolts. Tighten securely. Then press the chrome decorative bolt caps over each bolt until firmly in place. - Remove Cables and Hoses:
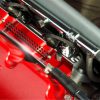
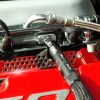
Use a small flat-head screwdriver to push in the upper and lower cable retainer tabs and release the throttle cable. Detach it and set it aside.
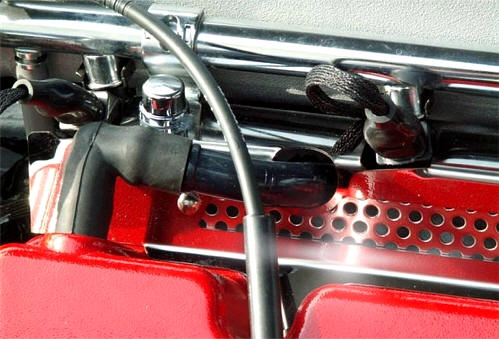
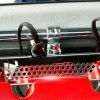
Using needle-nose pliers, squeeze the metal clamp on the hose (right side of the fuel rail), slide it forward, and disconnect the hose. Detach the left-side vacuum hose by pulling it straight up. - Tricky Step – Left Vacuum Tube:
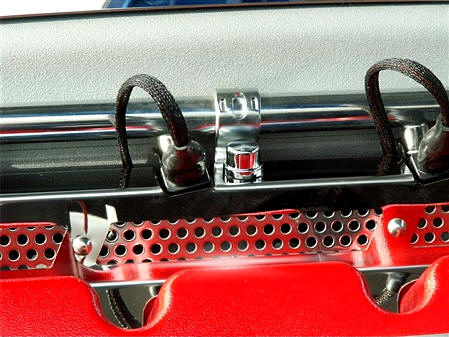
Carefully maneuver the new insert over the left vacuum tube through the hole provided. Be cautious not to detach the tube from the underside of the throttle body — it’s difficult to reinsert if it comes loose. The best method is to slide the insert over the tube’s rubber elbow instead of forcing the elbow through the insert. - Fit and Position:
Work the insert down the tube to position it close to the fuel rail. Align it with the valve cover notches and slide it under the wiper cowl ridge. Make sure it fits flush along its full length without catching anywhere. - Important Note:
The teeth of the cover must go in first to allow the insert to seat properly. Once positioned, reinstall the factory bolts, vacuum tubes, and throttle cable. Press the chrome bolt caps firmly in place. - Driver Side Installation:
Similar to the passenger side, but you’ll need to remove additional hoses and the throttle cable. Rotate the throttle cable retainer slightly to release it from the throttle bracket and spring. Use a small screwdriver to open the bracket and free the cable ball end. Once the cover is in place, reattach all hoses and cables. - Final Step:
Apply a generous amount of clear silicone adhesive inside each chrome bolt cap for a secure, lasting fit. Press each cap firmly over the bolts.
Once complete, you’ll instantly notice a stunning transformation — your Viper’s engine bay will shine with a high-performance, professional finish!


Reviews
There are no reviews yet.