


Description
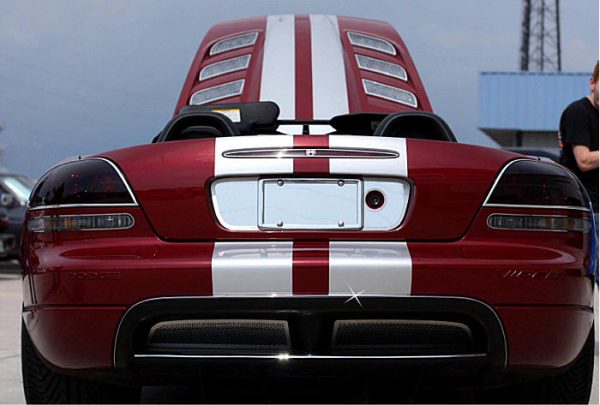
It’s a ‘Jaw-Dropper’ seeing it on your Snake!! Fits Convertible and Coupe.
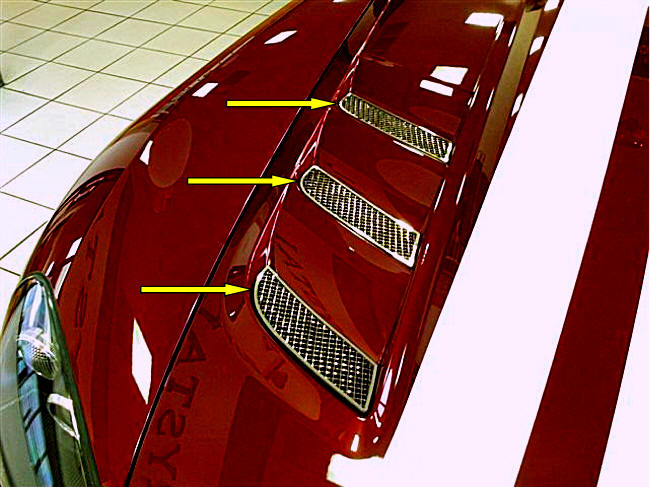
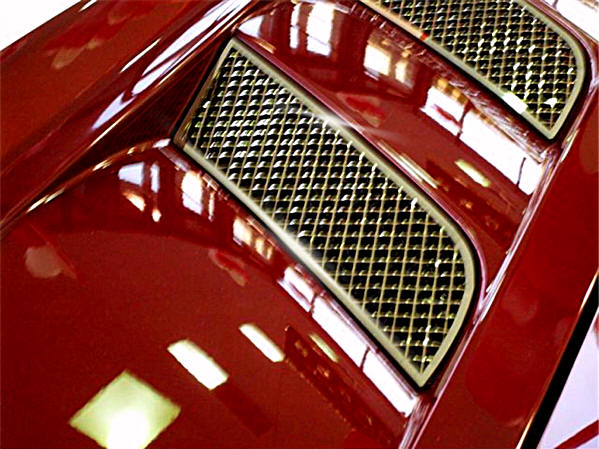
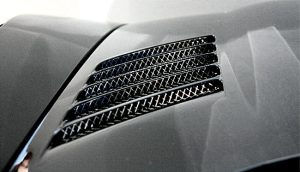
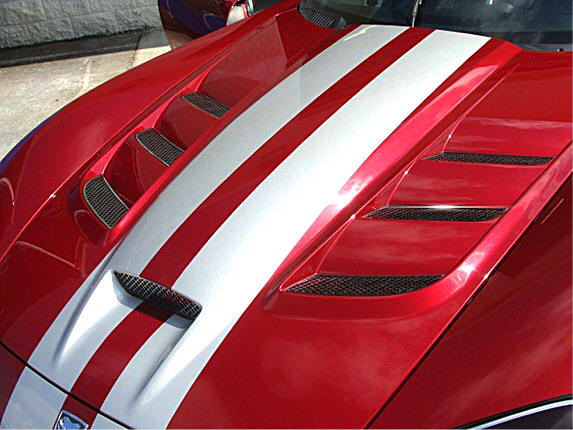
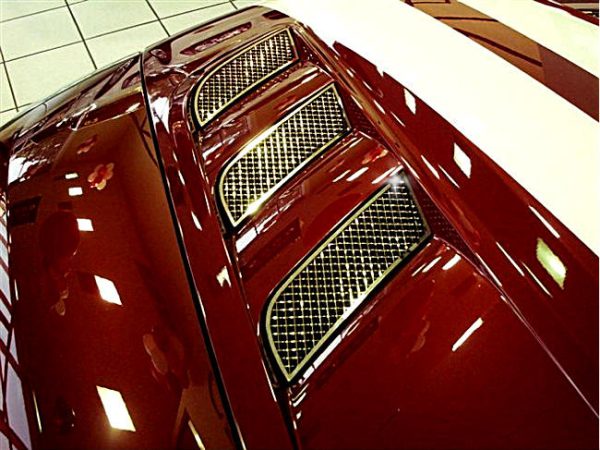
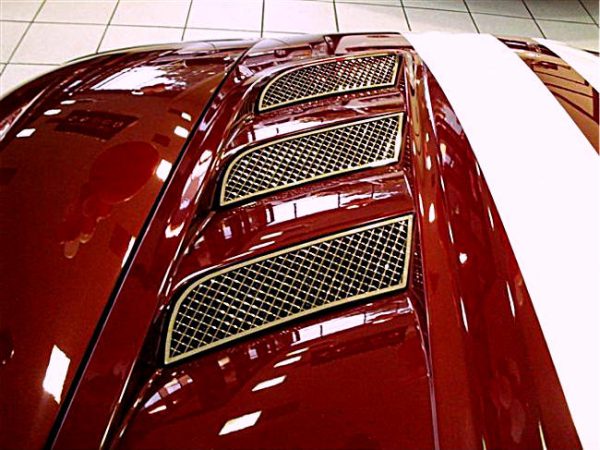
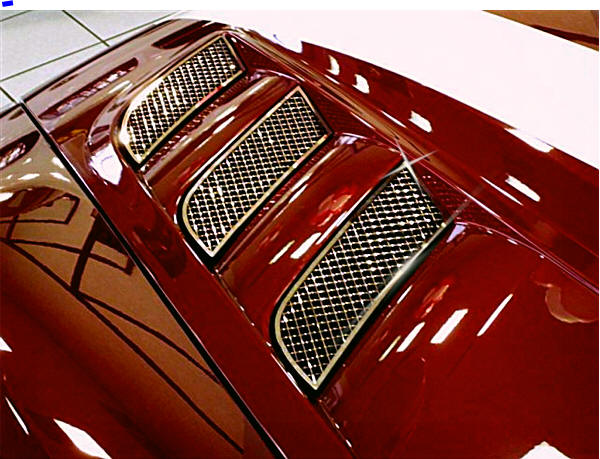
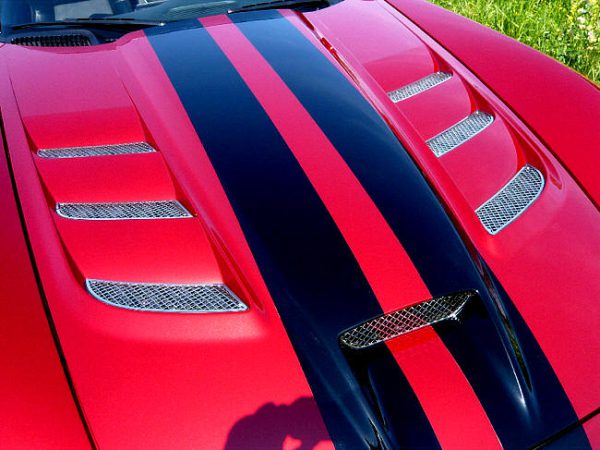
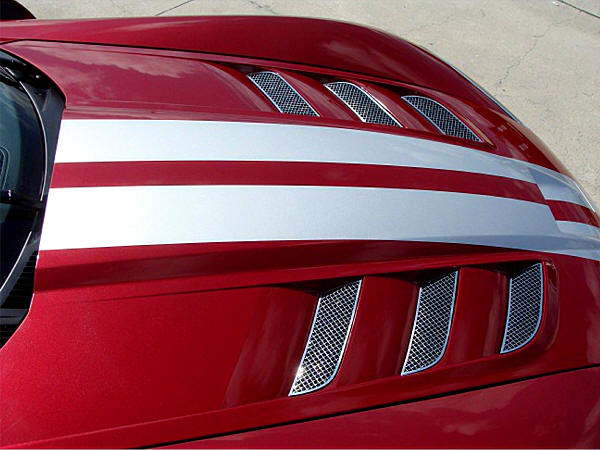
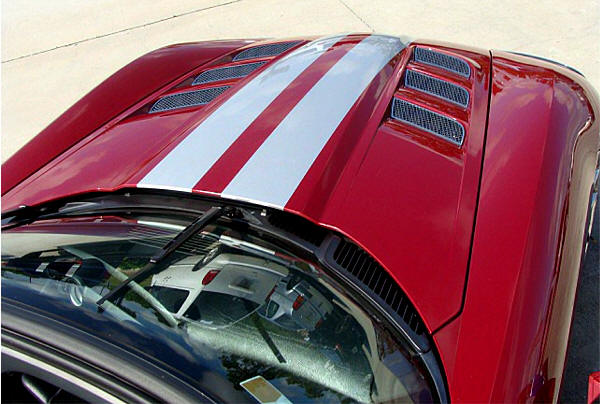
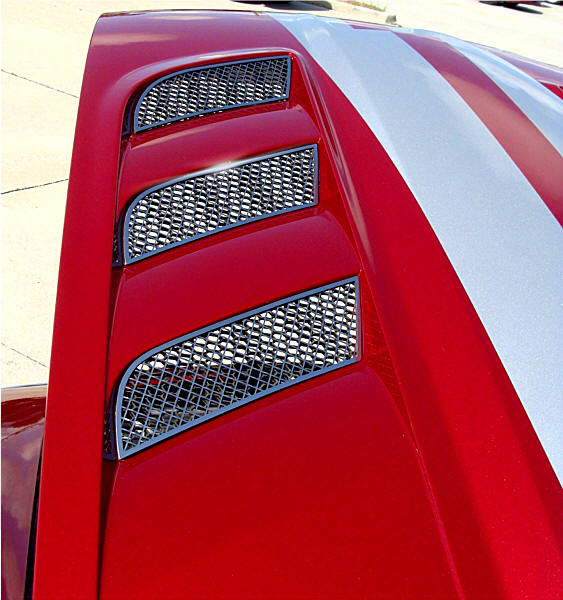
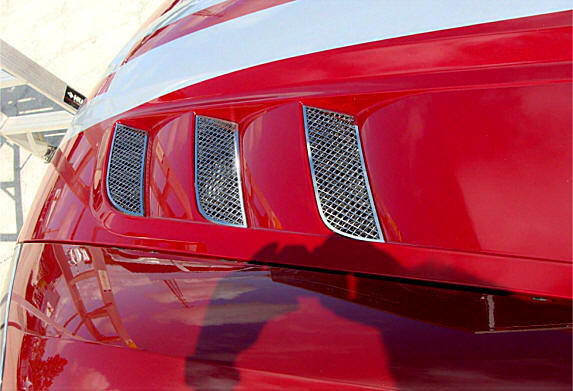
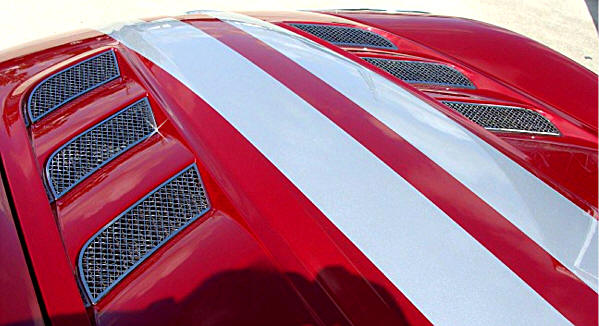
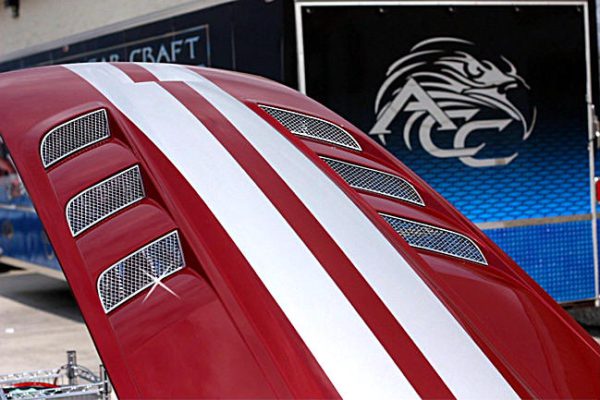
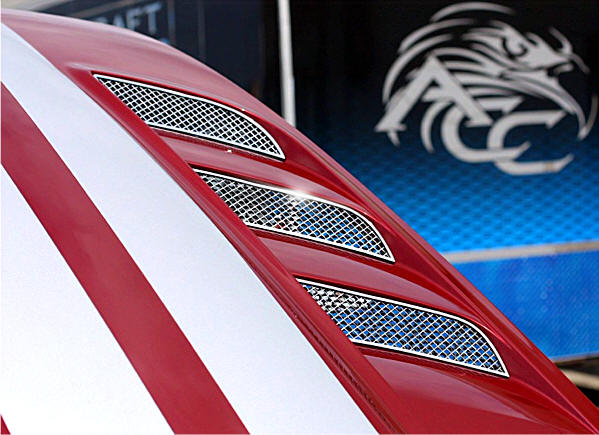
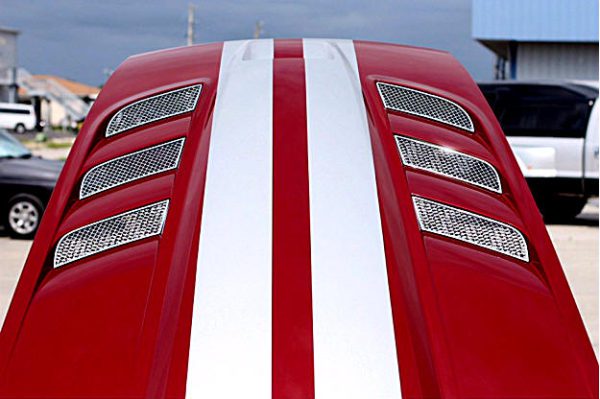
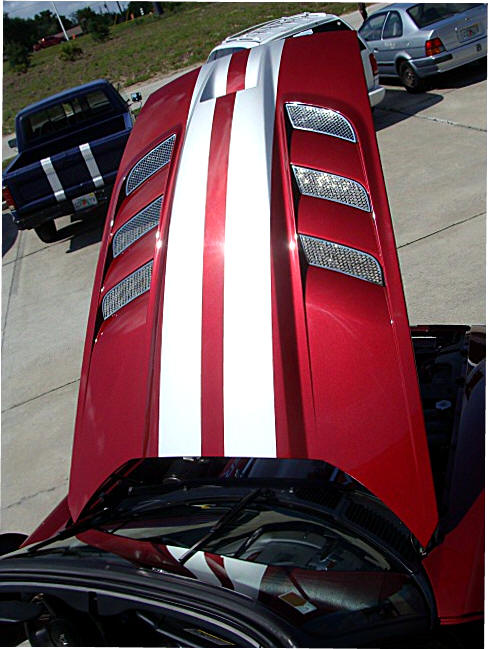
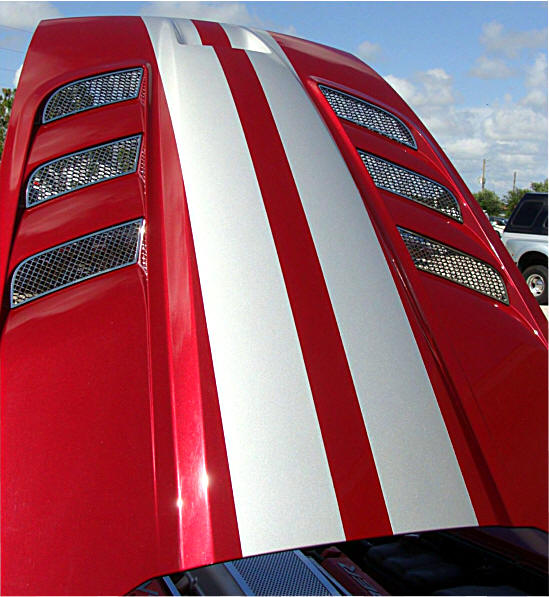
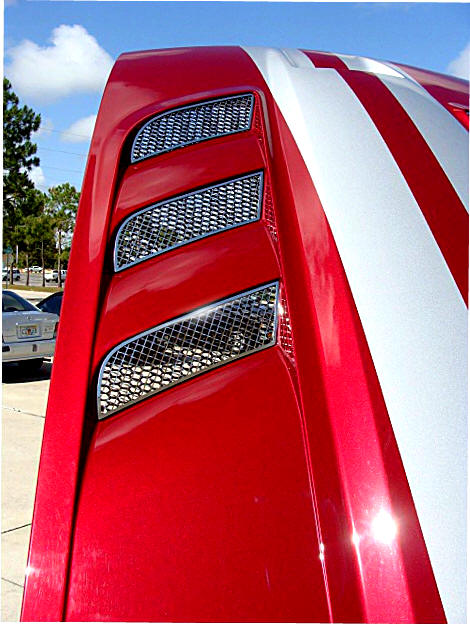
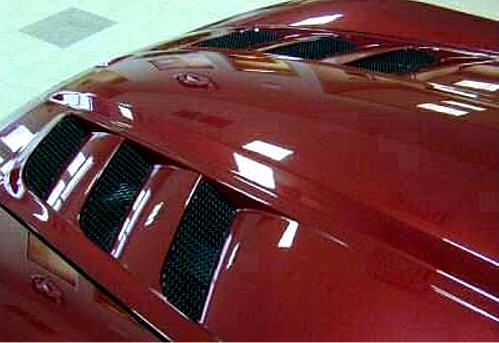
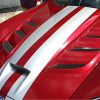
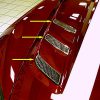
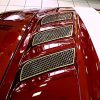
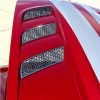
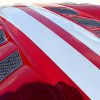
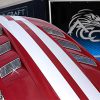
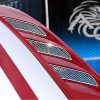
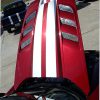
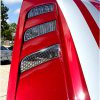
Extremely high-quality, all stainless steel laser-cut hood vent grille set. Includes six high-polished grilles—three for each side of the hood. These grilles have a highly polished mirror finish that will last forever. This is the most impressive upgrade you can make to the appearance of your Generation 4 Dodge Viper!
What an amazing difference! This upgrade will knock your socks off. People at car shows were left with their jaws dropped at the stunning appearance of this deluxe upgrade. A must-have for any Viper 2008-2010.
Easy mounting on top of the stock plastic grille with peel-and-stick and two fasteners per grille. Does not impede airflow, will not rust or corrode. Stays on during driving and can be removed without damaging your stock hood or grilles. Fits directly on top of stock grilles—nothing needs to be removed from your Viper.
INSTALLATION INSTRUCTIONS
Included: 6 x Diamond Mesh Hood Vent Inserts, 12 x Chrome Locking Ties, 2 x Pen of Adhesive Promoters
These new mesh grilles are ultra-thin, allowing them to mount directly to the factory vent surface, transforming the hood into a truly custom Viper. The laser construction captures light, creating a beautiful shimmering effect. The grille inserts are easy to install in just a few steps.
Your new inserts come flat, and they must be hand-formed to match the contour of each factory hood vent to achieve a long-lasting and permanent bond.
- Prepare each factory vent grille surface by thoroughly scrubbing the perimeter with alcohol to remove road grime, dirt, and any wax. The attachment area is small, so take your time to ensure the surface is completely clean.
- After cleaning, take the promoter pen and snap it in half to break the glass ampoule inside. Swipe the perimeter with the adhesive promoter. IMPORTANT: The promoter stick is NOT a cleaner but a bonding accelerator and MUST be used to ensure a permanent bond.
- Place each grille in its correct location. Gently hand-form (slightly bend) each grille to match the contour and shape of the factory black plastic grille EXACTLY without forcing it. This step is VERY important. Once shaped, the grilles will stay in position and lay flush on the factory grille, allowing the adhesive tape on the back to bond tightly.
- Peel the red release liner from the back of each grille and carefully place them into position, pressing firmly around the perimeter to set.
- Each insert comes with two small security ties to prevent wind uplift or theft. Pass the tie through the back of the grille from under the hood around the mesh and back under, securing to the factory honeycomb grille. Place ties at either end to be as inconspicuous as possible. Snug but not overly tight to avoid deforming the insert. Trim excess tie. Ensure symmetrical placement for the best appearance, with the connecting part of the tie under the hood.