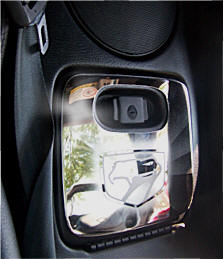
DODGE VIPER GLOVE BOX Cover - Polished
PART ACC-961003
INSTALLATION INSTRUCTIONS:
Included: 1 x Glove box Trim Plate, 1 x adhesive promoter packet, 1 x Tape test Kit
VERY IMPORTANT!
You must
follow all the steps as described below. Do not skip any steps.
1. BEFORE
you begin you must first prepare the GLOVE BOX area in order to allow
the Adhesive to Set! You can do this by scrubbing the entire
area first with household Rubbing Alcohol.
Your part will not bond permanently without
cleaning the surface with alcohol!
Caution:
If your glove box has been treated with armor-all or silicone coatings
such as wax, installation Will NOT work unless these treatments
have been REMOVED. You can check your local auto parts store for a ‘WAX
And SILICONE REMOVER’. We recommend a “3M-Wax and Silicone Remover).
If your
glove box has been treated with Armor-All the household Rubbing Alcohol
alone will not remove it. You must use a wax and silicone
remover.
NOTE: Some glove boxes have been treated at the dealerships
before you purchased the car. So to be extra safe you may what to use
the wax and silicone remover just in case.
2. Once this is done use the adhesive promoter (provided in the little plastic packet) to wipe your glove box’s entire area to be covered with your new glove box cover. Allow 30 seconds to dry.
3. Before you remove the red liner for permanent attachment place the Glove Box cover into position and check the fit. Your cover comes to you pre-formed but it maybe necessary to form (bend very slightly) by hand to insure a nice flat fit without forcing. Make note of its position.
4. Remove the red liner from the taped back and carefully reposition the glove box cover, be sure it is straight. Then press firmly on the cover to set.
5.
Let set
for 2 hours and then remove protective clear top liner.
Note:
Care must be
taken when cleaning your glove box cover. It is a good idea to lightly
dust your cover with a clean soft cloth first in order to prevent any
particles from scratching it. Then wipe (using a new clean soft cloth)
with a good quality streak free glass cleaner.
If any questions occur during installation please contact The Viper Store. admin@TheViperStore.com

TheViperStore.com a HotCarAccessories site
Copyright
