![]()
352 688 8160 M-F, 10:30am-5:00pm ET
DODGE Viper RT10 (96-02) with Center Hood Scoop) Racing Stripes Graphic Kit
PART #
ACC-962025
or
DODGE Viper RT10 (92-95 WITHOUT Center Hood Scoop) Racing Stripes Graphic Kit
PART #
ACC-962032
or
DODGE Viper GTS (96-02) with Center Hood Scoop) Racing Stripes Graphic Kit
INSTALLATION INSTRUCTIONS
Professional
installation recommended
Have Installation questions? call
(727)
861-1500
PARTS INCLUDED:
20-LABELED VINYL SECTIONS
6-TUBES OF ADHESIVE PROMOTER
1-FULL SIZE HARD SQUEEGEE
1-FULL SIZE SOFT SQUEEGEE
►Read through
ALL the directions before beginning.
THIS GRAPHIC KIT HAS BEEN DESIGNED FOR THE VIPER II BODY AND IS TO BE
INSTALLED BY A LEVEL 5 INSTALLATION PROFESSIONAL!! THIS KIT IS
CONSTRUCTED OF HIGH PERFORMANCE CAST VINYL THAT OFFERS A TEN YEAR
EXTERIOR LIFE. THIS VINYL WILL NOT CRACK PEEL FADE OR DISMANTLE PROVIDED
IT IS INSTALLED CORRECTLY USING THE PROPER MOUNTING SOLUTIONS AND
PROCEDURES. THIS GRAPHIC KIT SHOULD BE INSTALLED INSIDE IN A DUST
FREE ENVIRONMENT FOR THE BEST RESULTS.
1. Thoroughly clean the areas to be mounted with soap and water to remove any and all road grime and dirt. The vehicle must now be cleaned with an adequate wax and silicone remover. This step is CRUCIAL to achieve proper bonding and long term life. There are many prep solvents on the market. We recommend the 3m wax and adhesive remover sold in many auto part stores. Once the paint surface has been thoroughly cleaned of wax and contaminates a key step in the long term graphic life and installation will be to apply the adhesive promoter to specific areas of the vehicle. The adhesive promoter tubes provided are a special solution that will greatly accelerate the bond of your graphic and should only be used in the areas indicated by the instructions. All vinyl graphics by nature will have a tendency to shrink and or change shape over time due to elements such as heat, cold and car wash treatments etc... The use of the adhesive promoter will lock in the bond of all the edges and will help set the graphic at the edges during installation. Specific application of this adhesive promoter solution is as follows: Apply a single thin swipe at all the body seams and edges, the front and rear of the roof line, front and rear of the deck lid and the bumper edges. Do NOT apply the adhesive promoter to the sides of the graphic or to the main or broad areas of the graphic as this will ruin the installation. Application solution should only be applied into the body edges such as the seam between the hood and the nose, the grille opening edges and the very underside of the end of the graphic. This entire process will be referred to as a pro-bond procedure during the installation instructions.
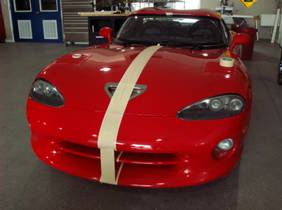
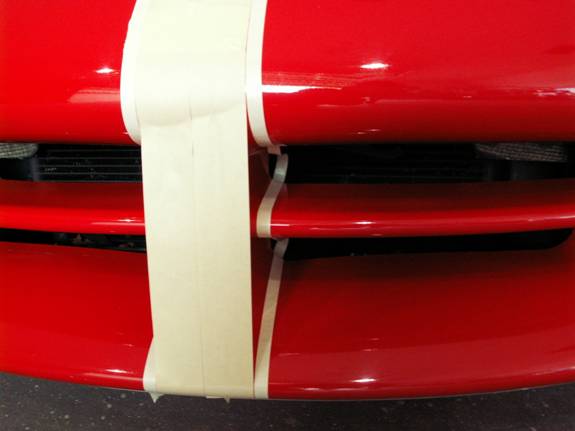
2. With the vehicle properly prepared mark the center locations of the hood at the wind shield as well as the front area towards the grill. Mark the center of the roof at the wind shield and back glass. Mark this center at the top of the bumper middle of the bumper as well as the lower valance. Mark the center of the trunk lid at the back glass the rear corner and down to the bottom edge of the trunk lid. Mark this center further down to the rear bumper above and below the license plate opening and down through the lower valence. After this has been done apply ½” masking tape to both sides allowing the tape to roll into the contours of the front nose and rear valance. Reference pictures attached:
3. Now that you have established an accurate vehicle centerline you can now create the center spacing between the two graphic stripes. Using masking tape lay strips (5" wide) directly along your center mark running all the way from the front side of the car to the back side. This will create an accurately centered 5'' spacing for you to guide you stripe application.
4. Your graphic kit has been sent to you with NO transfer liner so you will need to be very careful not to scratch the vinyl during installation and or handling. The reason your vinyl has no liner is so that you will be able to apply each section of the entire graphic and force the vinyl to conform to the compound shapes and contours of the vehicle. Keeping this in mind at all times you can install each section by applying the graphic with a solution specifically designed for wet application. There are many such solutions on the market however if you were to make an adequate solution you would fill a 32oz. high volume pray bottle with water then add two or three drops of straight baby shampoo. Baby shampoo is a pure detergent and works just as well as any available application fluid. Test your solution by spraying it onto the paint of the car. Properly mixed solution will sheet on the paint. If it beads add a little more soap until you can get a mixture that will sheet but be careful not to put too much soap as this will cause an over slippery fluid that can effect the graphic long term.
5. Your new graphic has come to you in several separate sections. For the sake of getting familiar with the application procedure lets start with the easiest and move on to the progressively harder applications. The roof sections are the most basic. The two roof sections are identical so take one of them and prepare to apply it to the roof top. Thoroughly saturate the roof top with your solution. Lay the graphic face down on the roof and peel the backing off as you spray the graphic allowing the graphic to cling to the wet roof. With the graphic section completely peeled and saturated flip the section over and into place, lining up the edge to your masking tape and allowing the front and back sides to overlap the roof. Carefully squeegee the section from the front to the back running along the center of the graphic as you squeegee the vinyl try to stretch the length slightly doing this will help work out the fingers that will be apparent along the sides. Do not do this too fast as this will tend to crease the vinyl. Once you have set the vinyl work out the remaining water from the center out to the sides. Soak off the water with a Bounty paper towel (lint free) to begin to dry the area. Lift one of the ends gently and soak the edge of the paint dry. You have been supplied with several packets of adhesive promoter. Wipe the paint edge with the promoter and allow it to dry. This procedure will greatly accelerate the bond and promote a long lasting attachment in this area. This procedure will be used through out the entire graphic installation in different areas. We will refer to this application as performing a “pro-bond”.
6. With the edge of the paint treated, lightly re saturate the graphic and squeegee it into the body edge. Allow the vinyl to set for a while. Generally if you move on to the next panel by the time you are done setting it you can go back to the first panel and trim the excess vinyl using your snap knife. NOTE: Be careful not to cut too deep and damage the paint.
7. The two hood sections are to be applied in the exact same way however the front and back ends are folded over. You will need to perform the “pro-bond” procedure at these edges to get the best results.
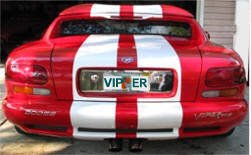
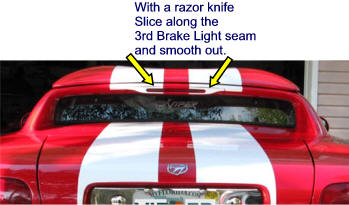
8. The trunk lid section as well as the front and rear bumper sections will require a little more skill. You will notice that these sections have been precut to fit the brake light as well as the large license plate area. The graphic has been designed to be placed at these areas and work out towards the top and bottom of the lid again using the “pro-bond” procedure for the edges.
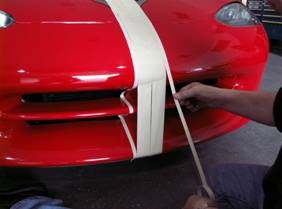
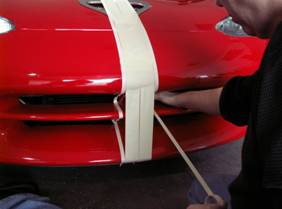
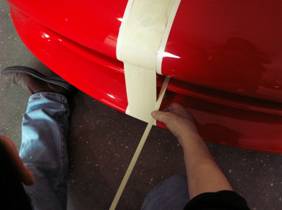
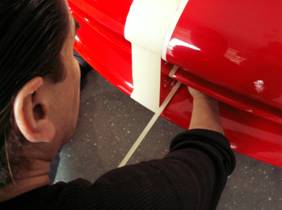
9. The front and rear bumper sections contain two parts designed to compensate for the shape and contour of the bumper itself. You will notice that they are not just straight sections of vinyl but carefully shaped sections designed to create a nice racing stripe that will appear to run straight down the bumper. The top section will have the license plate area cut from it. This will be your start point working out in all directions lining up with the center tape line and trunk lid sections. The lower section of the rear bumper will join nicely with the top section and you will need to perform the “pro-bond” procedure at the joint. Be sure to place the two together directly into the body contour to achieve a nice barely noticeable seam.
NOTE: The use of a heat gun will help to set the graphic and aid in the application however EXTREME caution must be taken when using a heat gun with this high performance vinyl as it is very thin and can become damaged very easily.
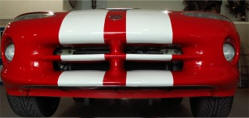
10. The front bumper and nose sections have been carefully shaped to capture a straight appearance when installed. Placing each section next to your guide and carefully stretch the vinyl until it conforms to the shape of the body. A heat gun will be necessary to set the edges and forced shape of the vinyl. Work slow and steady at these sections you will find that patience and consistent shaping will render excellent results.
VERY IMPORTANT! Your new graphic application should not be washed in any way for at least two days. After this time you should be able to wash and wax the entire car normally although pressure washing is NOT recommended.

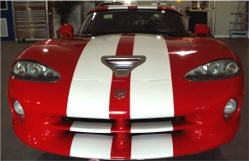
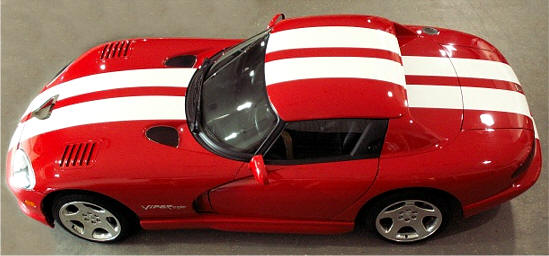
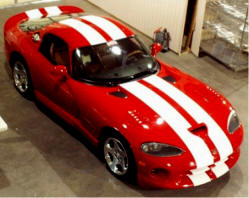
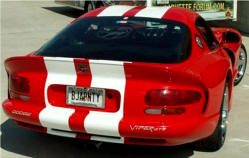
5' Center gap between stripes
Shown on GTS Coupe
2017
copyright
TheViperStore.com is a HotCarAccessories site